:max_bytes(150000):strip_icc()/Spark20plug20gasket-2000-b9c2758b4906430583af19dd434c6f29.jpg)
Though the diesel engine is the main worker on the farm, there are numerous gas power plants toiling away that also need maintenance. One crucial component, the spark plug, is often ignored, which has a huge effect on engine operation.
A spark plug appears simple in design and operation, and it is often taken for granted and is the recipient of improper service. Residing in the combustion chamber, a plug endures severe temperature fluxes, extreme pressures, electrical degradation, and chemical attack from the components blended into the gasoline. Despite the environment, the spark plug can deliver a very long life, if installed properly.
Here are five simple tips to keep a plug performing in any engine.
1. Clean before removing the old spark plug.
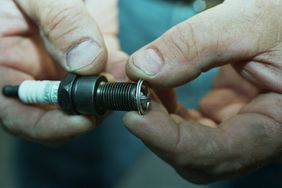
Before removing the old spark plug, use a compressed air gun to blow away any dirt or debris that may have collected around the exterior. The dirt cannot be allowed to enter the cylinder bore because it will score the wall and wear the rings. If the spark plug does not have a tapered seat, then a washer-style gasket is required. The gasket is installed with the small side toward the cylinder head. The length of the threaded area is called the reach and positions the electrode properly in the cylinder bore.
:max_bytes(150000):strip_icc()/Spark20plug20electrode_0-2-2000-63aeab422271442095b5696efa7bc8f3.jpg)
2. Always inspect a new plug for damage.
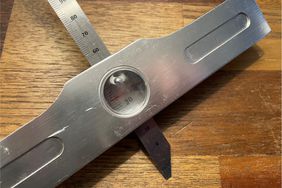
If dropped, check for cracks in the porcelain. Make sure the side electrode lines up with the center electrode and is straight. If not, gently reposition it with needlenose pliers. Next, employ a spark plug feeler gauge to obtain the proper gap between the electrodes.
When correct, the gauge will drag evenly on both the center and side electrodes. Make sure the gauge is straight and not cocked when checking. If the side electrode needs to be excessively angled up or down to create the proper gap, the spark plug is of the wrong design or the specification is incorrect.
:max_bytes(150000):strip_icc()/Spark20plug20cleaner-2-2000-499af58251aa4fa3bb6b71e93a9957a6.jpg)
3. Spray the cavity around the center electrode.
Using carburetor cleaner, spray the cavity around the center electrode while having the plug face downward so any material will fall out.
Gauge engine health by spark plug condition
The color and condition of a plug can reveal much about what is going on inside your engine. For example, a plug from a properly operating engine is grayish-tan to white. Don’t be alarmed if the plug is pinkish-red as this comes from using additives in unleaded fuel. The following appearances warn of engine problems:
• An insulator tinted charcoal with a fir-ing tip that is damp with gas indicates a faulty choke, overly rich fuel mixture, ignition problems, leaking fuel injectors, or a too-low plug heat range.
• A firing tip covered with black soot can indicate a too-cold plug heat range, an improperly adjusted carburetor, or a malfunctioning choke.
• When the ceramic tip, center, and electrodes are coated with a black, oily substance, oil is entering the combustion chamber, indicating worn rings, valve guides, or valve seals.
• A cracked, chipped, or broken insulator is caused by low-octane fuel or over-advanced timing.
• Electrodes that are eroded, have rounded edges, and are excessively worn should be replaced.
This will remove any porcelain dust or debris from manufacturing that can cause a misfire, especially under load.
:max_bytes(150000):strip_icc()/Spark20plug20anti20seize20compound-2-2000-0fab3e42676a4da6aa7fe7b6284033e8.jpg)
4. Coat the thread with antiseize compound.
This is especially important with an aluminum cylinder head or equipment that is not stored in a building. This will aid in removing the plug in the future without galling the threads in the cylinder head.
Flexible spark plug extension
Hand-starting a spark plug can be difficult in some engines, particularly when space is limited, as is often the case on many modern vehicles.
The solution is to create a flexible spark plug extension from an air hose or similar tubing with a1⁄2-inch interior diameter.
The porcelain top of the spark plug fits snugly inside the hose and won’t drop out. Also, the hose is stiff enough to provide twisting torque. The hose can be cut to any length to suit a particular situation.
Keep the antiseize compound away from the electrodes. If it gets on the electrode, wipe it off with a clean rag that is moistened with carburetor cleaner.
:max_bytes(150000):strip_icc()/Spark20plug20dielectric20compound-2-2000-7c3ac1f2fc6f48a0a9b83081a6660ab4.jpg)
5. Coat with dielectric compound.
Coat the secondary wire connection and the porcelain insulator where the boot sits with dielectric compound (available at most auto parts or farm supply stores).This compound deters corrosion and prevents the boots from sticking to the insulator, which can lead to wires breaking during future service.
Thread each plug in by hand and then tighten with the proper socket and wrench. The plug needs to be tight against the cylinder head to maintain heat transfer and to keep the bore sealed. Never use air tools to remove or to install a spark plug.
Autolite offers this guide to follow when tightening plugs in the absence of a torque wrench.
- For 14-mm and 18-mm park plugs with tapered seats, tighten the plug 1⁄16 turn beyond finger tight.
- Turn 14-mm and 18-mm gasket seat plugs 1/2 turn past finger tight.
- Turn 12-mm gasket seat plugs 3⁄8 turn past finger tight.
- Turn 10-mm gasket seat plugs 1/4 turn past finger tight.
Removing a broken spark plug
Typically, spark plugs are not difficult to remove, provided the plugs are replaced on a regular basis. However, spark plugs can break off, particularly in engines that have been sitting for long periods. This is why you hear antique tractor restorers raising the plight of broken plugs.
Understand that a spark plug is constructed like a hollow bolt. If you exceed the recommended torque during removal, the spark plug shell can shear off below the installation hex head.
One or more of the following causes can require excessive force to remove a plug:
- The plug was left installed for too long.
- Someone installed the spark plug using excessive force. Someone cross-threaded the plug during installation.
- Someone installed the plug with dirty threads. To avoid this, always clean the threads on plugs you have removed to clean their tips and electrodes, and then coat the threads with anti-seize compound.
The most common way to remove a spark plug that has twisted off above its hex head is to use an extraction bit, often called an easy-out bit. Champion Auto Parts highly recommends using only a square-cut bit as opposed to a spiral-cut bit.
With a spiral-cut bit, you risk a greater chance of causing the broken spark plug’s shell to expand, lock-ing it even tighter into the cylinder head as removal pressure is applied.
The square-cut bit employs a sharp flute that digs into the broken plug shell to provide a strong grip-ping surface without expanding the shell metal. Before you attempt to remove the plug, be sure to rotate the engine so the piston located below the plug is at the bottom center.
Also make sure the engine is cold. Next, soak the broken plug shell with a generous amount of penetrating oil. The key is to allow the penetrating fluid to seep into the plug’s threads. Now employ the easy-out bit (using the appropriate bit size that fits firmly into the empty spark plug shell).
Brace yourself while using a ratchet so the ratchet’s drive fits squarely on the easy-out bit. Apply firm, steady pressure in a counter-clockwise direction.
Although the required installation torque to remove a taper-seat spark plug is only 7 to 15 foot-pounds, Champion Auto Parts says it has heard reports of successfully removing a broken spark plug us-ing torques exceeding180 foot-pounds.
:max_bytes(150000):strip_icc()/Correcteasyouttouseforbrokensparkplugs_preview1-f78ff8d783824b1c9d3ad531d6096876.jpg)
Provided by Manufacturer


