:max_bytes(150000):strip_icc()/John20Deere20233020Mulch20Finisher5B15D-2-2000-398e201843474731a9fa36c0b7c49800.jpg)
Years of university, industry, and farmer field research pinpoint the essential role a planter plays in determining yield potential. Here are three key areas:
* Even seed spacing ensures each seed is given an equal chance to excel.
* Consistent depth placement provides even emergence.
* Complete seed-to-soil contact provides quick seed emergence.
As crucial as your planter's operation is in laying the foundation for high yields, your tillage equipment is essential in creating that foundation for peak planter performance.
READ MORE: Tillage matters
Your crop's bin-busting potential this fall is only achieved if tillage and planting are in sync this spring. "Thousands of dollars are spent on tillage equipment, but we devalue that investment by ignoring its operating condition and performance," stresses Successful Farming magazine Tillage Doctor Kevin Kimberley, who consults with farmers across the Midwest. "Such negligence is made worse by the fact that we're running our planters faster than ever while doing less tillage."
Successful Farming magazine assembled a team of tillage experts to create this guide to tillage maintenance and adjustment for high-performance in the shop and in the field. In addition to Kimberley, the team includes Chris Lursen of Case IH; Rye DeGarmo of Great Plains; Jarred Karnei of John Deere; Gary Johnson of Kuhn Krause; Jamie Meier of Landoll; and Larry Kuster of Sunflower.
The importance that tillage equipment has on planter performance can't be understated. "We've identified the seedbed floor as playing a key role in uniform emergence," says Lursen. "When that floor is smooth and firm, the planter runs smoothly, seeds are placed at the same depth with good seed-to-soil contact, and roots take hold in a desirable environment. Emergence is quick and consistent."
Also, tillage implements that are well maintained and adjusted to individual field conditions actually minimize downtime, "which is critical, especially in short-window seasons we've dealt with the last couple of years," says Meier.
READ MORE: Tillage options for farmers
In The Shop
1. Hitch and Frame
Preparing implements for optimal performance begins in the shop by conducting an inspection. Start at the hitch, working your way to the rear of the machine examining the frame. "Hitches can wear out, so they should be inspected for excessive wear," warns DeGarmo.
Examine the entire frame looking for cracks at welds (particularly at hinge points), twisted or bent frame members, "and worn or loose fasteners and their bushings," says Kimberley. "Catch and correct these problems in the shop before they break in the field."
If you have a bearing failure or had to replace a part in the past, check the area of that repair for collateral wear, says Johnson.
2. Hydraulic System
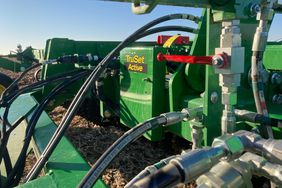
Hydraulic components are so well made that breakdowns are often minimal. However, that dependability could lure you into complacence and ignoring an inspection of all hydraulic hoses, their fittings, and couplers and cylinders, notes Kimberley.
Start at the hitch and examine hoses for cracking. Trace the system back to cylinders, looking for leaks. Leaks, in particular, compromise the ability of an implement to maintain tillage depth or to remain level in operation.
Kuster recommends raising and lowering an implement several times for the system to cycle fully, "because air in the hydraulic lines can allow the wings to sag. This step ensures the wings stay level with the machine's center section," he explains.
3. Tires and Hubs
Tires and hub bearings are often the most overlooked components on implements. But they have a huge impact on depth control and side-to-side leveling, warns Johnson.
"Larger tillage tools carry a lot of weight in transport positions, so it is very important to have the tires properly inflated before transporting on the road," adds DeGarmo.
Kimberley goes a step further and recommends spinning hubs by hand in the shop, "watching for smooth rotation and listening for bearing wear. Now is the time to replace worn bearings rather than after they have gone out in the field where they could possibly score a spindle in the process," he notes.
4. Soil-Engaging Components
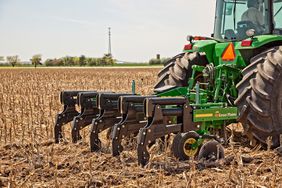
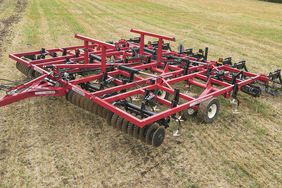
Any component on an implement that engages the soil is prime for wear. "Start at the front of the implement and examine disks or coulter blades (if you're using a field-finishing implement) to determine if they still hold sharp edges," Kimberley urges.
Operator manuals and parts guides offer great guidelines on replacement based on wear, says Karnei. As a general rule, seriously consider replacing disks and coulters after they have lost 10% of their original size, advises Meier.
For example, it is reasonable to expect good working conditions on disk blades that are 1 to 2 inches below their original size, points out DeGarmo. "Some farmers will operate the blades well into the 3- to 4-inch wear range, but this would not be recommended."
Another consideration is the variance in disk diameters between front and rear gangs. "It becomes increasingly more difficult to level machines when the blades vary an inch or more (from the front to rear)," Meier says.
READ MORE: Cut tillage to cut water
5. Shanks and Mountings
Shanks and their mountings exert a major influence on sweep or shovel performance. "I always check to see if they are twisted, particularly on implements that were running over fields that were rutted from harvesting during wet conditions, which happened a lot last fall," Kimberley observes.
He grabs each shank and moves it up and down and side to side to determine how worn its fasteners and related bushing are. "Be sure to check springs for elongation and lost tension and their mountings," Kimberley urges. "Mounting bolts and spring cups (retainers and washers) also do wear and break."
6. Finishing Attachments
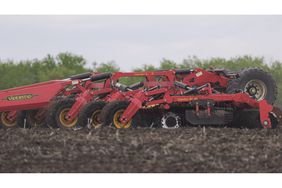
Not much can go wrong with a simple coil tine or spiked tooth harrow beyond wear. But more complex finishing attachments that also employ various types of rolling baskets or tines and leveling bars make preseason inspections of these components an absolute must, particularly since farmers now depend on such attachments to finish the field for the planter.
"Some areas of the country have experienced some tough, wet springs, and that has put a lot of extra wear on implements and, in particular, finishing attachments," Kimberley says.
He recommends inspecting all the attachment components, including their frame and mounting points.
When it comes to ground-engaging components, pay attention to tines or spikes (if so equipped) at the front of the ranks, as they wear fastest Kimberley says.
Karnei notes that coil tines and spike teeth are usually the last wear components to be replaced with some farmers "trying to limp the tool's harrow through until trade."
Regarding rolling baskets, the key here is to appraise their bearings for smooth rotation. Also examine the baskets for bent rods or bars, which is a particular problem in fields with rocks.
Finally, as finishing attachments are positioned so far back on an implement, they are most likely to accidentally hit a tree or fence point. So take a look at their outer edges for damage, says DeGarmo.
In The Field
With your implement tuned up in the shop, you need to cash in on its performance capacity by adjusting equipment to varying field conditions during the season. As a rule, check adjustments whenever conditions change, whether it's an alteration in soil type, residue coverage (such as when changing between corn and soybean fields), or varying soil moisture (as can happen as the day progresses and fields dry out).
Initial adjustment at the start of the season is a two-person job, Kimberley says. "With the operator in the tractor, a second person needs to drive alongside the implement checking its performance while it is operating. With the size of today's equipment, you
really can't do much of a job checking an implement's performance from inside a tractor cab. The best time to check an implement's performance is while it is operating."
DeGarmo also stresses the need to check operating performance daily. "Doing a visual inspection each day is a good practice to ensure proper performance and to catch small issues before they become big problems," he says.
While walking about an implement, be sure to check the soil both at the seedbed surface and the seedbed floor, adds Lursen.
Because today's implements are far more complex with a myriad of possible adjustments, following are four areas to concentrate on.
1. Leveling
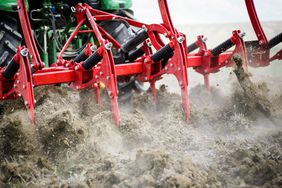
The ultimate goal is to have an implement delivering even tillage side to side and front to back. Common symptoms of a misadjusted implement are the swales and ridges left behind in the field.
"These undulations cause row units to bounce since you are leaving strips of a soft seedbed (where sweeps ran deep) or hardpan (where they failed to till)," Kimberley explains. "Uneven tillage leaves trails that can be seen a month later in uneven seed emergence. I can't stress enough what level operation has on planter performance."
A level shop floor or driveway offers a great starting point of measuring the side-to-side height of the frame while there is still weight on the tires, says DeGarmo. "Having even an inch of difference on the right side of a center frame compared with the left side can have a serious impact on the machine's performance when it's time to go to the field."
Karnei says while many farmers do a good job leveling an implement from side to side, fore-to-aft level is often overlooked.
While leveling an implement on concrete is a good starting point, Johnson urges making final leveling adjustments in the field using an assistant to observe the machine while it's working.
"When checking fore-to-aft settings, many times a tillage machine will rock back when the tractor is stopped in the field," Johnson says. "This can give the appearance that the tillage machine is tail-heavy sitting still. In reality, the machine may be operating level under load."
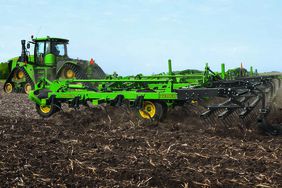
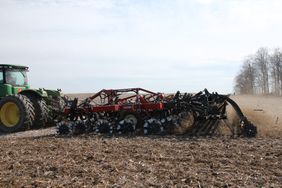
When using a disk or field finisher, be sure to check the soil at the center rear of the tool where the soil is returned by the rear disk gangs, says Kuster. "An implement that is level front to rear will produce a complete and level fill of the valley cut by the front gangs," he adds. "If soil forms a valley, the rear of the tool needs to be lowered. If a ridge is present, the rear of the tool is too deep."
READ MORE: Steel Deals-Late model disks
2. Tillage Depth
First thing in the spring and during the season, examine operating depth both by digging into the field in several locations across the entire width of an implement and by digging down to the bottom of disks or sweeps with the implement at rest but still in the soil.
"I have often found tillage depth at the wings is not the same depth as at the main frame, which could indicate a leaky hydraulic cylinder or low tire," Kimberley notes. "I also insist that all of my clients use chains that hang off the front corners of their implements so they check depth on-the-go, as well." Such leveling chains run 4 inches off the ground to provide the tractor operator a quick check of running performance.
Kimberley prefers to have finish implements set to evenly distribute trash on the surface. "Leave trash on the surface where a planter's trash wheels can sweep it out of the way for the double-disk openers," he says.
Kuster recommends carrying some weight on implement wheels. "It is sometimes tempting to retract tires completely to allow tools to work as deep as they will go. Don't do it," he urges. "This will nullify every leveling and depth adjustment leading to fields with little seedbed uniformity."
3. Speed
When it comes to setting speed, follow the operator's manual for initial adjustments and vary speed by conditions.
Kimberley prefers to run finishing implements, particularly field cultivators, fast. "I tell my clients to run cultivators at 8 mph to 8½ mph. Doing so generates more tillage vibration through the sweeps and helps explode the soil-reducing clods," he says. "Faster speeds help to distribute trash."
Lursen points out that contrary to popular belief, some tillage tools tend to run deeper at higher speeds rather than pulling up to the surface. "Going from 5½ to 7½ mph with a field cultivator, for example, might call for adjusting the implement to maintain the same depth," he explains. "Really, whenever operational speeds change due to field conditions, it's a good idea to get out of the cab and check the soil – both the seedbed surface and seedbed floor."
4. Finishing Attachments
In addition to double-checking that any finishing attachment is operating level, also determine if the full width of the attachment is making complete contact with the soil.
"This is your last chance to break up clods, level out the surface, and distribute residue – all of which has an influence on planter operation," Kimberley says.
Johnson adds that misadjusted attachments are a huge issue. "Improper adjustment (along with broken or missing tines and spikes) can concentrate residue deposits on top of the seedbed," he observes.
"Too much down pressure on rolling baskets can encourage soil buildup in wet conditions and compress the seedbed, making it difficult for planter ground-engaging components to function properly," he says. "Baskets usually consist of varying lengths to match machine section widths and, therefore, require their down pressure to be individually adjusted."
