:max_bytes(150000):strip_icc()/HowToBuildingCoop1-4a8bca01b11a409abc9051db797f59f7.jpg)
Better Homes and Gardens/Living the Country Life
What You’ll Need
Equipment / Tools
Tools
- Tape measure and pencil
- Miter saw
- Pocket-hole jig
- Clamps
- Impact driver
- Electric drill
- ³⁄₁₆-inch twist drill bit, ½-inch spade bit
- Circular saw
- Straightedge guide
- Jigsaw
- Hammer
- Square
- Metal-cutting snips
- T50 stapler
- Paintbrush or roller
Materials
Lumber
- 22 2×4 inch 8 foot pressure treated boards
- 6 4×8-foot sheets ½-inch-thick exterior-grade plywood
- 1×6-inch 10-foot pressure treated board
- 2 1×8-inch 8-foot pressure treated boards
- 8 1×2-inch 8-foot pressure treated boards
- 2 2×6-inch 8-foot pressure treated boards
Hardware
- 100 2½-inch pocket-hole screws
- 5-pound box 3-inch deck screws
- 5-pound box 1⅝-inch deck screws
- Roll chicken wire
- 1,000 T50 ½-inch stainless-steel staple-gun staples
- 1-pound box #8 galvanized casing nails
- Drip cap
- 2 1-pound boxes 1-inch roofing nails
- 1-pound box of 1-inch deck screws
- 8 2-inch hinges
- 3 Slide bolts
- Padlock hasp
- Snap hook
- 3 Barrel bolts
Building materials
- 1 Roll 30-pound roofing felt
- ⅓ square shingles (three-tab asphalt shingles or cedar shingles)
- 1 Roll double-faced, cloth-backed carpet tape
- ¼×27×27-inch clear acrylic sheet
- Primer and exterior-grade paint
Instructions
Interested in building a chicken coop on your property but not sure where to start? In this article, we’ll take you through a step-by-step process to construct a homemade chicken coop for your flock.
1. Build wall frames
From the 2×4s, use a miter saw to cut eight uprights 58½-inches long, four front/back plates 41 inches long, and four side plates 38 inches long. With a pocket-hole jig set for 1½-inch thick lumber, drill two pocket holes in the 3½-inch face at each end of all the plates.
Then, for the front wall frame, lay two uprights on a flat surface. Place two front/back plates between the uprights and perpendicular to them.
Position one plate with the top edge flush with the top ends of the uprights and the other with the top edge 27 inches from the bottom ends of the uprights.
Following the jig instructions, clamp the upright and plate faces flush with each other and drive 2½-inch pocket screws through the pocket holes in the plates and into the uprights. Repeat with two more uprights and the remaining front/back plates for the back wall frame.
For the sidewall frames, repeat the procedure using the remaining uprights and the side plates. Drill a row of ³⁄₁₆-inch holes, 12 inches on center, through the 3½-inch faces of the front and back frame uprights, ¾-inch in from the outside edges.
2. Join the frames
Carry the frames to the chicken coop location. With a helper (or two), stand the rear frame and one side frame upright to form a corner. Clamp the frame uprights together with the outside edge of the rear frame upright flush with the outside face of the side frame upright.
Make sure the tops of the frames are flush. Drive 3-inch deck screws through the holes in the rear upright and into the side upright. Clamp the second side frame to the rear frame to form the other rear corner and drive the screws.
Clamp the front frame to the side frames and fasten it with screws. Square up the assembly by measuring diagonally from inside corner to inside corner.
Adjust the coop frame until the diagonal measurements are equal.
3. Install the floor
From 2×4s, cut two joists 45 inches long, two ramp frame sides 21¾-inches long, and one ramp frame end 12 inches long. Position the ends of one joist at the midpoints of the lower side frame plates with the top edges flush.
Drill ³⁄₁₆-inch holes through the plates and drive 3 inch deck screws through the holes in the plates and into the joist. Repeat at the upper side frame plates with the remaining joist. (The upper joist ties the tops of the sidewall together and provides a perch for the chickens to roost.)
Position the ramp frame sides between the floor joist and the front frame lower plate, 12 inches apart and centered on the joist and plate. Make sure the top edges are flush. Drill ³⁄₁₆-inch holes through the joist and plate and drive 3-inch deck screws.
Position the ramp frame end between the frame sides to form a 12×12-inch opening, drill ³⁄₁₆-inch holes, and drive 3-inch deck screws.
For the floor, use a portable circular saw and straightedge guide to cut a 4×8-foot sheet of ½-inch exterior plywood in half across the width.
To accommodate the frame uprights, cut 4½×8-inch triangles off each corner with the 4½-inch triangle legs on the front and back edges of the floor and the 8-inch legs on the sides.
Slide the floor through the front frame opening and rest it on the front, back, and side plates. With the floor edges and plate outside edges flush, drill ³⁄₁₆-inch holes through the floor, aligned with the centers of the plates, joist, and ramp frame members.
Fasten the floor with 1⅝-inch deck screws. Drill a ½-inch hole through the floor in one corner of the ramp opening frame, and cut the opening with a jigsaw, carefully guiding the blade against the frame members.
4. Create wall opening frames
To create the window opening in the front frame, the nesting box opening in the rear frame, and the door opening in the side frame, from 2×4s cut seven jambs 27½-inches long, two sills 24 inches long, and one header 18 inches long.
Drill pocket holes at the ends of all the parts. Position two jambs between the floor and the front frame upper plate, 24 inches apart and centered in the frame.
With the jamb and plate faces flush, drive 2½-inch pocket screws through the holes in the jambs and into the floor and upper plate. Repeat at the back frame with two more jambs.
Determine which side will receive the door and repeat at the side, this time spacing the jambs 18 inches apart. On the other side, install a single jamb, centered between the upper and lower plates. At the front, position a sill on the floor between the jambs and drive the pocket screws.
At the rear, position the top of the sill down 18 inches from the bottom of the upper plate, and screw it in place.
5. Add the roof frame
From 2×4s, use the miter saw to cut 12 rafters 42½-inches long, making 45° cuts at both ends with the cut angles going in the same direction.
To make a “bird’s mouth” notch in the rafter where it will sit on the top plate of the side wall, measure 5⅞-inches from the point of one rafter and use a square to mark a line perpendicular to the rafter edge.
Draw an equilateral triangle with 1 ½-inch-long legs with the perpendicular line running through the 90° corner of the triangle and the hypotenuse along the rafter edge. (One leg of the triangle is parallel to the rafter end cut and the other leg is perpendicular to the end cut.)
Cut the notch with a jigsaw. (The bird’s mouth cutout is at the bottom end of the rafter, cut into the bottom edge.) Using this rafter as a template, trace the notch onto seven additional rafters and cut them out. Set the remaining four rafters aside.
Using the jig, drill two pocket holes at the top ends off our rafters, offsetting the holes closer to the bottom of the 45° end cut. Drill a pocket hole at each bird’s mouth, positioning the jig against the triangle leg that will be parallel to the ground.
Lay the rafters flat on the ground in pairs, one with pocket holes at the top and one without. With the angled ends held tightly together, drive the pocket screws.
With a helper, carefully position two sets of rafters, one pair at a time, on the front and rear frames with the bird’s mouths sitting on the tops of the uprights. Drive the pocket screws.
Position the remaining rafter pairs on the side frame upper plates, spacing them 16 inches on center between the front and rear rafters. Temporarily brace the rafters in place.
6. Sheet the walls
For the front wall, clamp a 4×8-foot sheet of ½-inch exterior plywood to the frame, leaving 1½ inches of the frame lower plate exposed. Trace the top edges of the rafters onto the plywood. Remove the plywood and cut along the lines using a portable circular saw and straightedge guide.
For the gable vent, mark a point on the centerline of the sheet, 22 inches down from the point of the gable. With this point as the center, draw an 8-inch-diameter circle. Drill a ½-inch hole inside the circle and cut it out with the jigsaw.
Cut a 12×12-inch piece of chicken wire and staple it over the hole on the inside face. Re-clamp the plywood to the frame.
Drill ³⁄₁₆-inch holes through the plywood where there are frame members, and drive 1⅝-inch deck screws through the holes and into the frame members. Repeat for the rear wall.
For the side walls, cut two 37×48-inch pieces of ½-inch plywood. Clamp one piece to one side frame with the top edge against the bottom edges of the rafters. To mark notches for the rafters, hold a square against the sides of the rafters and draw lines onto the plywood.
Measure from the top edge of the sheet to the top of a rafter.Remove the sheet, mark the depth of the rafter notches, and cut them with a jigsaw. Re-clamp the sheet to the frame.
Drill ³⁄₁₆-inch holes through the plywood where there are frame members, and drive 1⅝-inch deck screws through the holes and into the frame members. Repeat for the other sidewall.
:max_bytes(150000):strip_icc()/101648401-ac13dc0e812e47ce9136dc3bdd3ac778.jpg)
BETTER HOMES AND GARDENS/LIVING THE COUNTRY LIFE
Drill a ½-inch hole through the wall sheeting in onecorner of the window opening frame and cut the openingwith a jigsaw, carefully guiding the blade against the framemembers. Repeat for the door and nesting box openings.
7. Sheet the roof
Retrieve the four extra rafters (the ones without the bird’s mouth notches) and drill four ³⁄₁₆-inch holes in each, evenly spaced along the center of the 3½-inch wide face. Clamp these “lookout” rafters to the front and rear walls with the top edges flush with the angled top of the wall. Fasten the rafters with 3-inch deck screws.
Cut two 41×52-inch pieces of ½-inch plywood. Position one piece on one side of the roof, flush with the edges of the lookout rafters at the front and back, and with the top edge aligned with the top ends of the rafters. The bottom edge protrudes beyond the bottom ends of the rafters.
Make sure the two pairs of interior rafters are 16 inches on center and drill ³⁄₁₆-inch holes in the plywood, centered on the rafters.
Fasten the sheet with 1⅝-inch deck screws. Repeat at the other side of the roof.
8. Add the roof trim
From the 1×6, cut two fascia boards 52 inches long. Position them on the bottom ends of the rafters, ends flush with the faces of the front and rear lookout rafters, and with the top edges against the underside of the overhanging roof sheeting.
Nail the fascia boards to the rafter ends with #8 galvanized casing nails.
From 1×8s, cut four rake boards 46¾-inches long, making parallel 45°cuts at both ends. Position them on the lookout rafters, with top angled ends tightly together and the top edges flush with the top surface of the roof sheeting.
Nail the rake boards to the lookout rafters with #8 galvanized casing nails. The rake ends should protrude about ¼ inch beyond the fascias. To ease the point at the bottom end of the rake boards, draw a 1½-inch radius arc tangent to the bottom edge and end.
Cut the curve with the jigsaw. Because the roof drip cap will cover part of the fascia and rake boards, prime and paint these parts.
9. Shingle the roof
Attach the roof drip cap to the bottom edges of the roof sheeting with 1-inch roofing nails. Leave a ¼-inch gap between the bottom edge of the cap and the fascia boards.
Cut three 53½-inch-long pieces of 30-pound roof felt. Position one piece on each side of the roof, covering the drip cap. Fasten the felt with staples. Center the remaining piece of felt over the roof ridge and staple it in place.
Attach drip cap to the front and back edges of the roof with 1-inch roofing nails, covering the ends of the roof felt.
Leave a ¼-inch gap between the bottom edge of the cap and the rake boards. Install shingles, following the instructions printed on the package.
10. Add a window, door, and trim
Use double-face tape to adhere a 27×27-inch piece of ¼-inch clear acrylic over the window opening in the front wall. From 1×2s, cut two trim boards 27 inches long and two 24 inches long. Adhere the trim boards to the acrylic pane around the edges, short ones at the sides and long ones at the top and bottom, covering the ends of the short trim boards.
Drill ³⁄₁₆-inch holes through the trim boards and the acrylic pane.
Drive 1⅝-inch deck screws through the trim boards and acrylic pane and into the wall. For the window dividers, cut 1×2s to length and fasten them to the outside of the acrylic pane by drilling ³⁄₁₆-inch holes through the acrylic and driving 1-inch deck screws from the inside into the dividers.
For the side door, cut a 17¾ × 17¾-inch piece of ½-inch plywood. To trim the door, cut two 17¾-inch-long pieces and two 14¾-inch-long pieces of 1×2. Position the trim on the front face of the door with the edges flush.
Fasten the trim from the back with 1-inch deck screws. From 1×2, cut a diagonal brace to length, position it corner to corner inside the perimeter trim and fasten it with 1-inch deck screws.
Screw 2-inch hinges and a slide bolt to the door, place it in the opening with even gaps all around, and screw the hinges to the wall. Align the slide bolt strike with the bolt and screw it to the wall.
From 1×2s, cut eight 36-inch-long corner battens. For the front and rear battens, make 45° cuts across the 1½-inch-wide faces at the top ends of four battens. For the side battens, cut 45° bevels at the top ends of the remaining four.
Position the front and rear battens on the front and rear walls with the edges flush with the surface of the sidewall sheeting and the angled end cuts against the bottoms of the lookout rafters.
Mark the finished length at the bottom, flush with the bottom edge of the wall sheeting. Cut the battens to length and nail them in place with #8 galvanized casing nails.
Position the remaining battens on the side walls with the edges flush with the faces of the front and rear battens and the top bevels against the bottom of the lookout rafter.
Mark the finished length at the bottom, flush with the bottom edge of the wall sheeting. Cut the battens to length and nail them in place with #8 galvanized casing nails.
11. Build the nesting box
BETTER HOMES AND GARDENS/LIVING THE COUNTRY LIFE
BETTER HOMES AND GARDENS/LIVING THE COUNTRY LIFE
BETTER HOMES AND GARDENS/LIVING THE COUNTRY LIFE
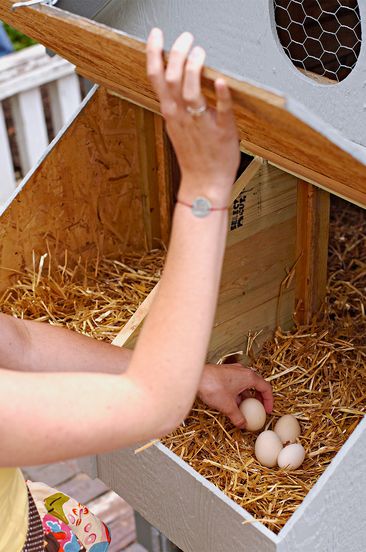
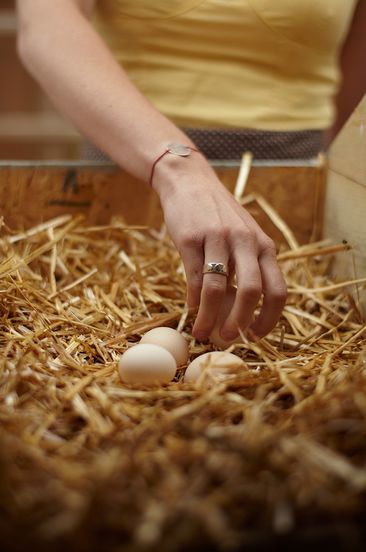
From ½-inch plywood, cut three 18×18-inch pieces for sides and a divider, a 17½×23-inch bottom, a 6×23-inch front, a 4×23-inch top, and a 19×23-inch lid. On the sides and divider, make marks along the edges 4 inches from one corner and 6 inches from the opposite corner.
Draw lines to connect the marks. Using the portable circular saw and straightedge guide, cut a 12×14-inch triangle off the corner of each side. For the divider, take one of the pieces and trim ½ inch off the 4-inch-long edge and ½ inch off the 6-inch-long edge.
From 1×2, cut three top cleats 4 inches long, three bottom cleats 17½ inches long, and three front cleats 4½ inches long.
On the inside faces of the sides, position top cleats ½ inch in from the 4-inch-long edges, flush at the back, bottom cleats ½ inch in from the opposite edges, flush at the back, and front cleats ½ inch in from the 6-inch-long edges, with the bottom ends against the bottom cleats.
Fasten the cleats from the outside with 1-inch deck screws.Use 1¼-inch deck screws to fasten the 4-inch-wide top to the top cleats, the 17½-inch-wide bottom to the bottom cleats, and the 6-inch-wide front to the front cleats.
Fasten the remaining cleats to one face of the divider, top cleat flush at the back and top, bottom cleat flush at the back and bottom, and front cleat flush at the front with the bottom end against the bottom cleat. Slide the divider into the box, centered, and fasten it from the outside with 1¼-inch deck screws.
Slide the nesting box into the opening in the rear wall, with the ends of the sides flush with the inside faces of the 2×4 framing. Fasten the box to the framing with 1-inch deck screws. Screw 2-inch hinges to the top of the lid, position it on the box, and screw the hinges to the box top.
Screw the padlock hasp to the lid and the box front. Secure the hasp with a snap hook.
12. Install the ramp
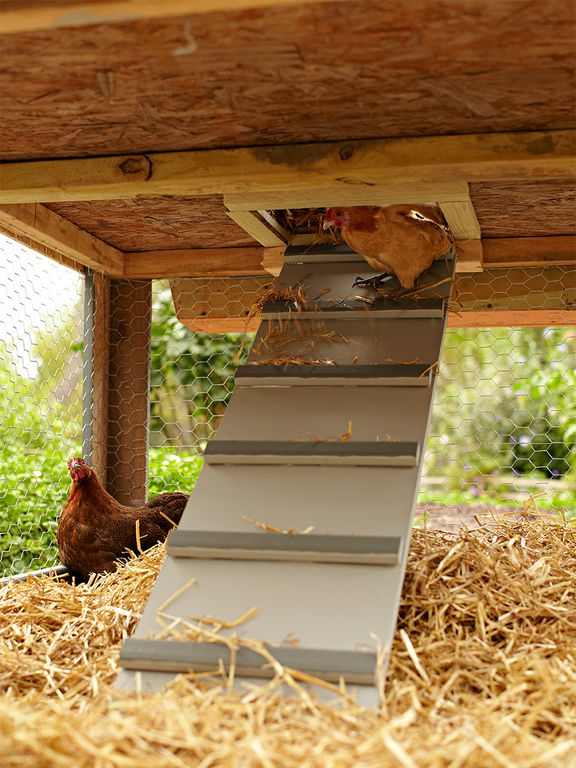
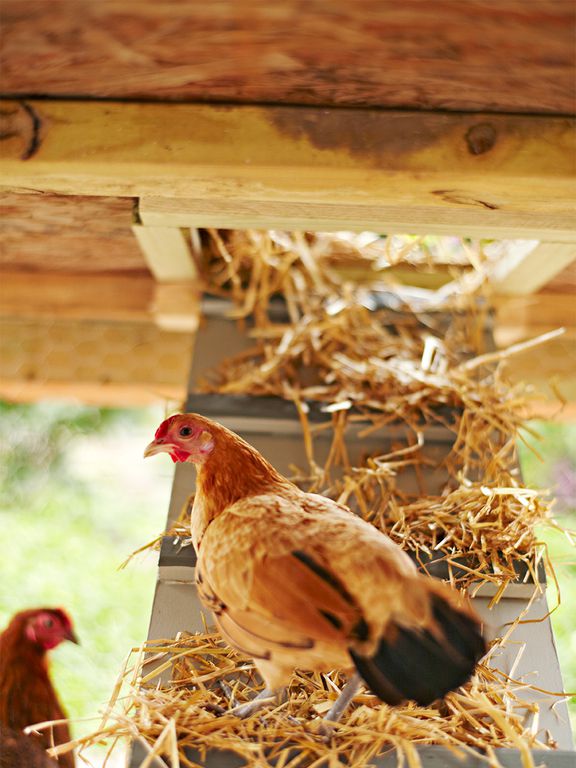
From ½-inch plywood, cut a 11½ × 39-inch ramp. From 1×2s, cut seven cleats 11½ inches long. Screw the cleats to the ramp 6 inches on center, leaving equal spaces at the ramp ends. Insert one end of the ramp into the floor opening and attach it with 2-inch hinges.
If you want to keep the chickens inside the coop at night, you can swing the ramp up to cover the opening and prop it in place.
BETTER HOMES AND GARDENS/LIVING THE COUNTRY LIFE
BETTER HOMES AND GARDENS/LIVING THE COUNTRY LIFE
13. Enclose the run
To make a swing-up gate at the rear of the coop, from 2×4s, cut two gate rails 40½-inches long and two gate uprights 14½-inches long. Drill pocket holes in the ends of the uprights. Arrange the parts to make a rectangular frame, and assemble it with 2½-inch pocket screws.
Cut a 21×40-inch piece of chicken wire and staple it to the inside of the gate. Position the gate in the opening, centered side to side, and secure it to the exposed edge of the rear-wall bottom plate with 2-inch hinges. Screw a pair of barrel bolts to the ends of the lower rail. Align the barrel bolt strikes with the bolts and screw the strikes to the wall frame uprights.
To complete the enclosure, from 2×6s, cut one front skirt board 45 inches long and two side skirt boards 43½-inches long.
Position the front skirt between the side frame uprights at the front of the coop with the bottom edge on the ground. Drill ³⁄₁₆-inch holes through the skirt and fasten it to the backs of the front frame uprights with 2½-inch deck screws. Position the side skirts between the front skirt and the rear frame uprights with the bottom edge on the ground.
Drill ³⁄₁₆-inch holes through the skirt and fasten it to the backs of the side frame uprights with 2½-inch deck screws.

BETTER HOMES AND GARDENS/LIVING THE COUNTRY LIFE
Cut a 25-inch× 5-foot-long piece of chicken wire and wrap the front and sides of the run from the outside. Fasten the chicken wire to the exposed edges of the front and side lower plates, frame uprights, and skirt boards with staples.
14. Finish
Prime and paint the structure. We selected complementary colors for the walls and trim. If you wish, add optional touches such as a window box, a cupola, and weather vane. Add straw for bedding and move in the chickens.
:max_bytes(150000):strip_icc()/LisaFoustPrater-5d5284849acc417c8678324f9c660161.jpg)


