:max_bytes(150000):strip_icc()/ChainandBinderStorageRack-2-780a29bb4fe7440dbd3d9483cf436a61.jpg)
David Ekstrom
Project Overview
- Working Time: 1 hour, 30 minutes
Too often chains and binders end up on shop floors or piled in pickup beds. When you need them, they’re a tangled mess of different sizes and lengths.
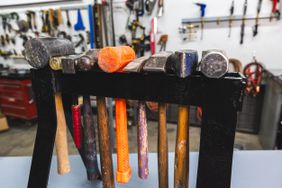
Farmer Greg Haglin of Howard Lake, Minnesota, came up with this nifty chain rack that anyone with some basic welding skills can make. Greg’s design keeps your chains organized, separated, and always handy. To build it yourself, all you’ll need is a welder, grinder, and some 2x2-inch angle iron.
Oh! And don’t forget your safety gear.
What You'll Need
Equipment / Tools
- MIG welder
- Metal band saw or angle grinder with cut off disc
Materials
- Angle iron
Instructions
Read the instructions
:max_bytes(150000):strip_icc()/ChainandBinderStorageRack-14-42132d3589844c36945b47c61cfb026c.jpg)
David Ekstrom
This rack is built from 2x2-inch angle iron, which is ⅜-inch thick. You can also use ½-inch thick material.
- Cut the sides of the rack 24 inches long. These could be extended out to 28 or 32 inches long.
- The ends of the rack are cut to 16 inches, but these could be made wider to suit a person’s particular need.
- Cut the legs on the rack to be 24 inches tall but could extend to 28 or 36 inches if there is lots of long chain.
- Weld the long sides and short ends of the rack with the angle iron pointing up and out. If you need to, clean up your welds with a grinder.
- Load it up! You’ll appreciate this organization next time you need a chain.
